Table of Contents
Introduction
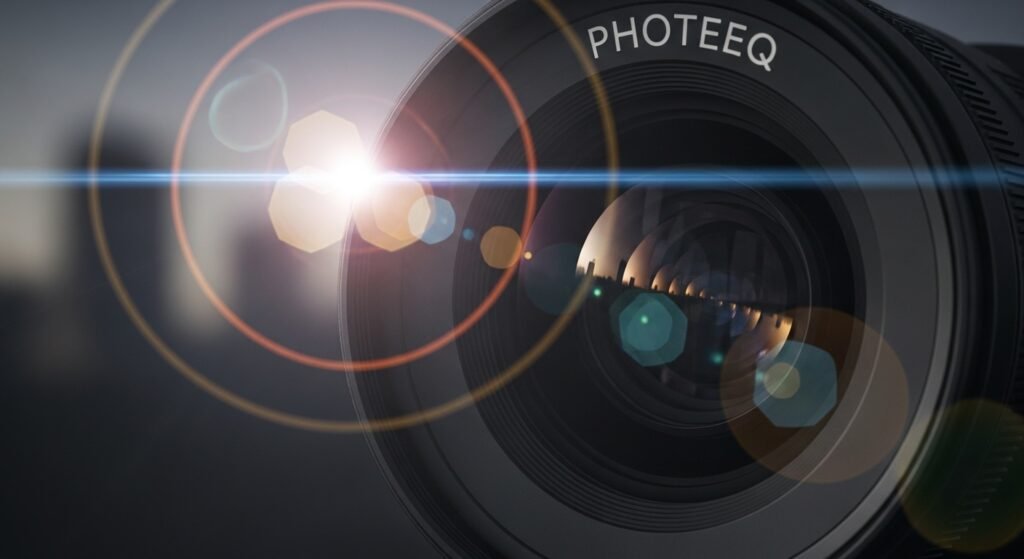
Have you ever looked at a photo and noticed a beautiful glow or light streak that made it feel magical? That effect is often called a lens flare, and it can instantly add a dreamy, cinematic look to your pictures. If you’ve been searching for an easy way to create this effect, then Photeeq Lens Flare might be exactly what you need.
Photeeq Lens Flare is a photo editing tool and plugin that lets you add realistic lens flare effects to images. Whether you’re a beginner or someone who loves playing with photo filters, this tool is simple, fun, and powerful. You don’t need fancy skills or expensive software—just a creative eye and a little imagination.
In this article, we’re diving deep into how Photeeq Lens Flare works, how to use it easily, why it stands out, and how you can take your photo game to the next level. Let’s explore how to make your photos shine—literally!
What Is Photeeq Lens Flare?
Photeeq Lens Flare is a special photo editing tool that lets you add lens flare effects to your images. Think of it as a way to simulate the light that enters a camera lens and creates colorful reflections or glows. In real life, lens flares happen naturally when a camera faces a bright light source, like the sun. However, with Photeeq Lens Flare, you can add or control this light in your editing app, without needing perfect lighting while shooting.
Photographers love it because it gives them the freedom to stylize their photos and make them look more cinematic or warm. The tool is easy to use and blends well with software like Adobe Photoshop or Lightroom. Beginners can enjoy it too, because the settings are simple to adjust, and the results are almost always beautiful.
If you’re just exploring photo editing or want to upgrade your photos with something subtle and stunning, Photeeq Lens Flare is a great tool to start with.
Why Use Lens Flares in Photography?
Lens flares aren’t just “pretty lights.” They can tell a story or set a mood. By using tools like Photeeq Lens Flare, photographers can add emotion to everyday images. For example, adding a warm sun flare to a portrait taken outside can make it feel cozy and full of life. A cool blue flare on a street photo might give it a futuristic look.
Lens flares can also make your pictures feel more like scenes from a movie. They add drama, energy, and character. Even a basic photo of a car or landscape can look completely different with a correctly placed lens flare.
But beware, not all flares are equal. Too much can make an image look fake or messy. That’s why tools like Photeeq Lens Flare are valuable—they offer smooth, customizable effects that stay realistic.
How Does Photeeq Lens Flare Work?
Photeeq Lens Flare works as a plugin or add-on inside photo editing programs. Once installed, you can open your photo in software like Photoshop and use Photeeq to add flare overlays.
Here’s how it works in simple steps:
- Choose a lens flare effect from the built-in gallery.
- Drag and position the effect where you want it.
- Adjust the brightness, angle, color, and size of the flare.
- Blend it naturally with your photo using opacity settings.
You stay in total control. If the flare looks too strong, simply tone it down. If it looks off-center, move it around. In just minutes, you can turn a normal picture into something stunning.
This is especially helpful for photographers who shoot indoors, on cloudy days, or in settings without strong natural light. You don’t need to wait for the perfect sunset—you can create one with a click.
Installing Photeeq Lens Flare: A Quick Start Guide
Getting started with Photeeq Lens Flare is easy. Here’s a beginner-friendly guide to help you install it:
- Go to the Photeeq website or trusted plugin source.
- Download the Lens Flare plugin for your system (Windows or Mac).
- Open your photo editing software (like Photoshop or Lightroom).
- Install the plugin by following the setup instructions provided.
- Once installed, restart the editing program to activate Photeeq Lens Flare.
Now when you open an image, you’ll find the new lens flare tool under your “filters” or “effects” tab. Click it, and you’ll have access to dozens of flare options to play with.
Many users love how light the plugin is—meaning it won’t slow down your computer. Even if you’re new to editing, the clean design and simple layout make it very beginner-friendly.
Using Photeeq Lens Flare for Portrait Photography
Portraits are a great place to use Photeeq Lens Flare. Whether your photo is taken indoors or outside, adding a lens flare can boost its beauty. You can place a warm flare on the edge of someone’s shoulder to mimic sunlight. Or softly blend a glow in the background to create depth.
Here are some tips when using lens flare in portraits:
- Use warm colors like golden yellow or orange for a natural look.
- Keep the flare off the subject’s eyes to avoid distractions.
- Try lowering the flare’s opacity to let it gently blend with skin tones.
Many photographers say using Photeeq Lens Flare adds a soft and romantic touch to portraits. It’s perfect for weddings, senior photos, or family shoots.
Photeeq Lens Flare in Outdoor Photos
Some outdoor shots look beautiful but feel flat. This is where Photeeq Lens Flare comes in handy. Adding a lens flare can make the sun look brighter or enhance evening light for mood.
For example:
- A sunset photo becomes more powerful with a bold, round flare near the corner.
- A picture of a forest in early morning benefits from soft, scattered light rays.
- A photo of a mountain or lake can look more majestic with a faint blue flare.
The trick is matching the flare to the scene’s natural light. That’s the magic of Photeeq—it offers many styles, from vivid flares to soft glows.
Creating Cinematic Photos with Photeeq Lens Flare
Photos can look straight out of a movie when you add just the right kind of light. Photeeq Lens Flare makes this easy because it lets you customize every part of the flare.
Tweak the shape, direction, and even the lens type. These details mimic Hollywood-style lighting effects. You can create a sci-fi feeling with sleek blue flares or go for a dramatic movie poster look with sharp orange ones.
Movie directors often use lens flares for action scenes, sunsets, or emotional storytelling. As a photographer or creative artist, you can do the same with a few simple steps.
Imagine your cityscape looking like a superhero film setting—that’s what this tool can help you create.
Combining Photeeq Lens Flare with Other Effects
Photeeq Lens Flare is strong on its own, but it’s even better when combined with other filters. You can use it alongside color grading, lighting adjustments, or texture overlays.
Here’s how to get the best results:
- First, color correct your photo to make it look balanced.
- Then, add a soft flare to enhance the light direction or angle.
- Finish by using a vignette or blur effect to lead the viewer’s eye.
The goal is not to use too many effects, but to make them work together. Think of Photeeq Lens Flare as your special finishing touch.
Real User Reviews and Experiences
Many people who used Photeeq Lens Flare love how easy and fast it works. Reviewers often say it helped improve their editing without needing advanced skills.
One hobbyist from Texas said, “I used to struggle with editing, but Photeeq made my photos look professional in minutes.” Another user who runs a small photography business mentioned how clients noticed the difference in lighting and atmosphere once she started using flares.
People tend to love the natural glow, especially when doing social media posts or product photos. For beginner editors, it’s hard to go wrong with this plugin because the controls are simple and the changes are not permanent—you can always undo anything.
Tips for Using Photeeq Lens Flare Like a Pro
If you want to use Photeeq Lens Flare and make it look flawless, here are a few expert tips:
- Don’t use flares in every photo—save them for moments where light can tell a story.
- Match the color of your flare to the photo’s tone.
- Use symmetry and direction to make the flare blend naturally.
- Try placing the flare just off-frame for a subtle, dreamy effect.
- Test different strengths—sometimes softer is better.
Over time, you’ll get a feel for which type of flare works best and when. And with a tool like Photeeq, learning is fun and frustration-free.
FAQs
1. What is Photeeq Lens Flare used for?
Photeeq Lens Flare is used to add realistic light flare effects to your photos during editing.
2. Is Photeeq Lens Flare good for beginners?
Yes! It’s very beginner-friendly with simple controls and great results, even for first-time users.
3. Can I use Photeeq Lens Flare in Photoshop?
Absolutely. Photeeq integrates well with photo editing tools like Photoshop and Lightroom.
4. Does Photeeq Lens Flare cost money?
Some versions or features may be free, while others are part of a paid plugin pack.
5. Will using flares ruin my original photo?
No. Most editing tools, including Photeeq, let you work non-destructively so you can undo or test changes.
6. Can I create movie-style images with Photeeq Lens Flare?
Yes! Many artists and photographers use it to create dramatic, cinematic images with amazing lighting effects.
Conclusion
By now, you’ve probably seen why so many people love using Photeeq Lens Flare in their photography journey. It makes adding magical light effects simple, fast, and fun. Whether you’re editing portraits, landscapes, or creating cinematic scenes, Photeeq gives you the tools to shine.
If you’re new to editing, don’t worry—this tool is made for creativity, not complexity. Just open a photo, play with the settings, and let your imagination guide you.
Ready to make your images pop with light and mood? Give Photeeq Lens Flare a try and see your creativity come to life. You don’t need to be an expert to make beautiful things—you just need to start.